
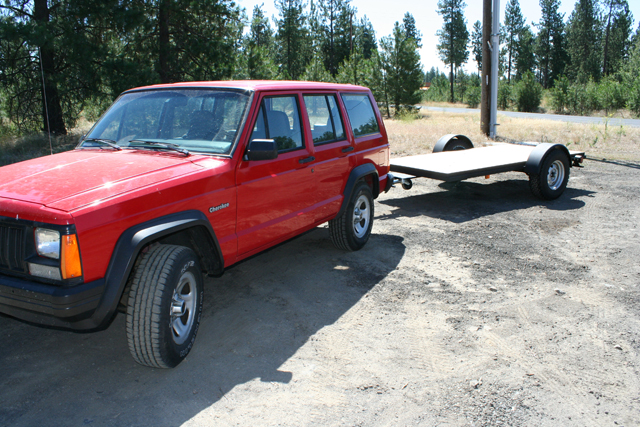
Why I Built My Own Teardrop Trailer Chassis
Our 2007 jPod Teardrop Trailer Chassis is a weld-together original. Many Tear droppers choose to purchase a bolt together trailer from Harbor Freight or a similar foreign import trailer supply source. I researched these trailer chassis for quite some time but never found one that would satisfy me with build quality and stability. Most of them seem poorly designed and made of inferior materials –like really bad.
Instead, I chose to get quality American steel and weld it together.
My Trailer Chassis Requirements
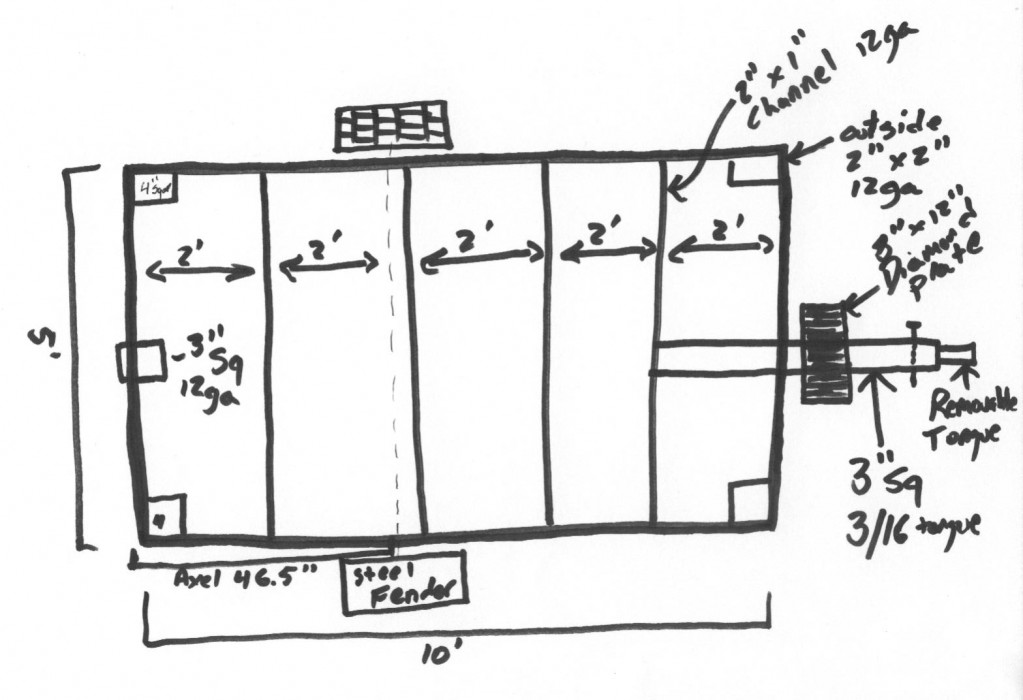
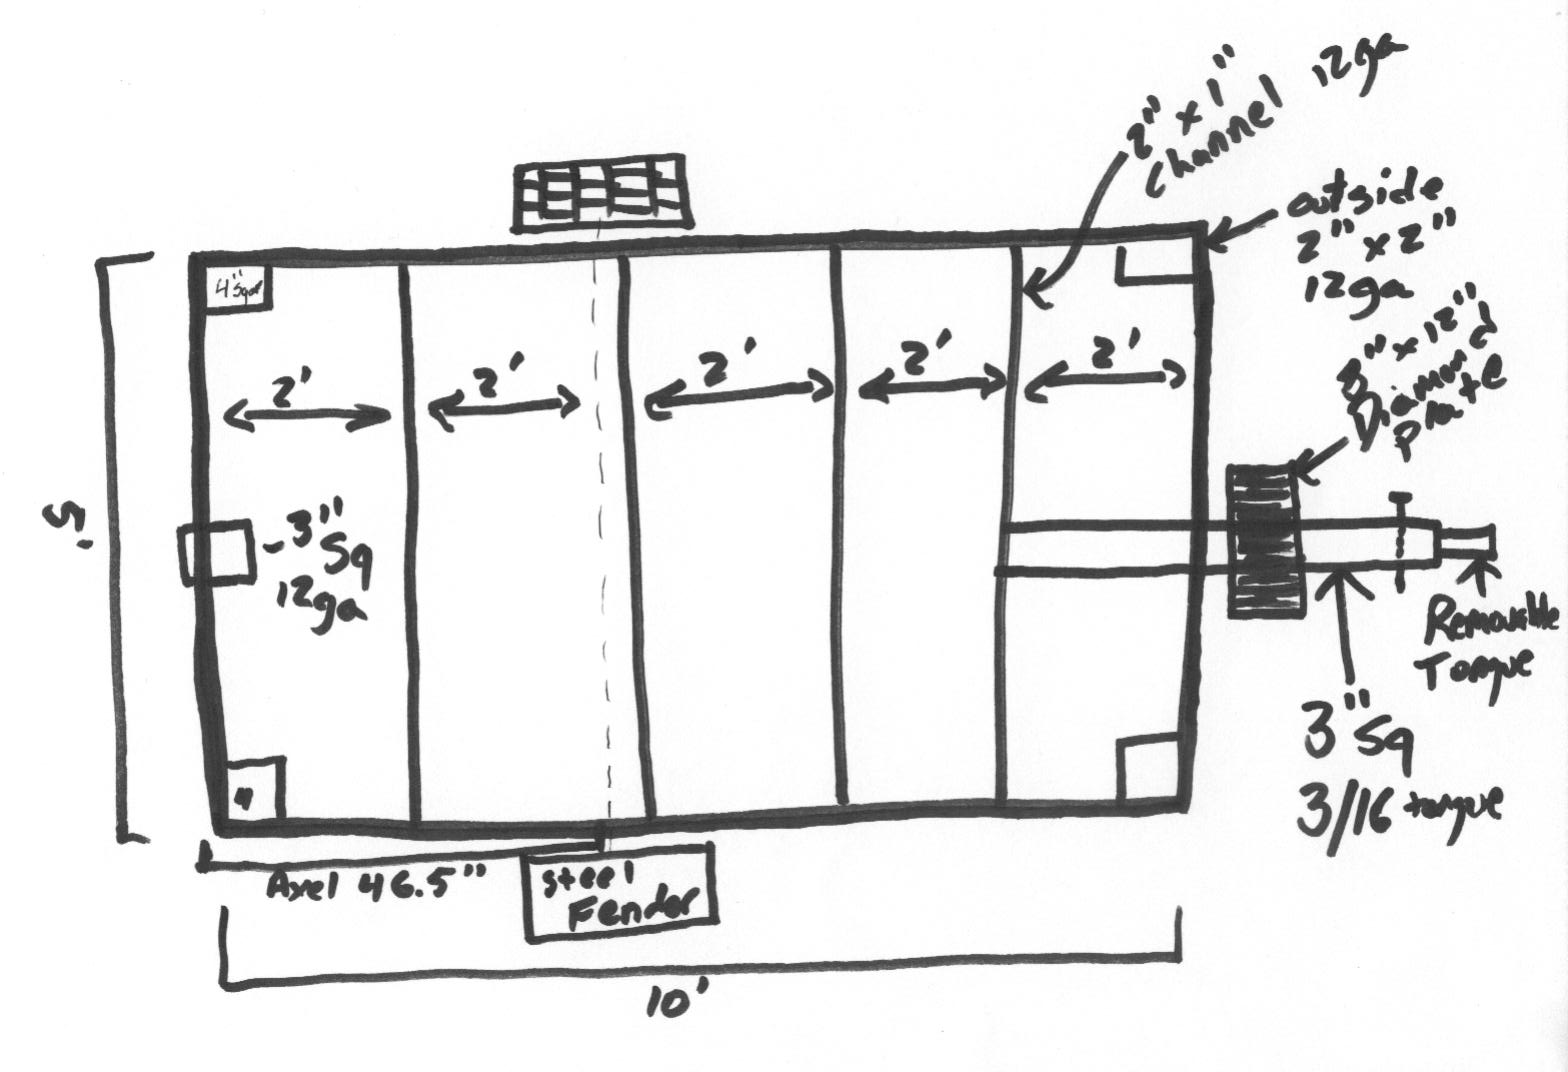
- 5’X10′
- 3500 lb axle
- Accepts standard sized Jeep wheels (5 on 4.5″ bolt pattern)
- Options to put a rear hitch receiver on the trailer and tow hooks included.
- Tongue length long enough to minimize damage to Jeep or trailer when jack-knifed
- Submersible LED trailer lighting
- Submersible hubs
Since I am rather picky, I chose to make my own homemade weld-together teardrop trailer chassis from scratch.
I drew up my design and determined all of the parts and materials I would need. I started making orders for steel and parts. The first part that I got is my axle.
Looking For Professional Trailer Frame Plans?
Choosing an Axle
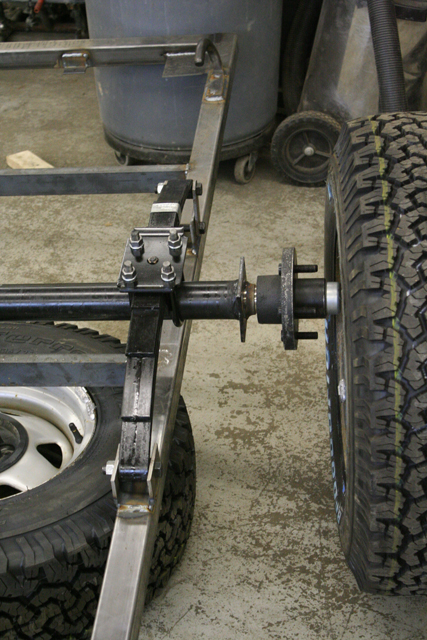
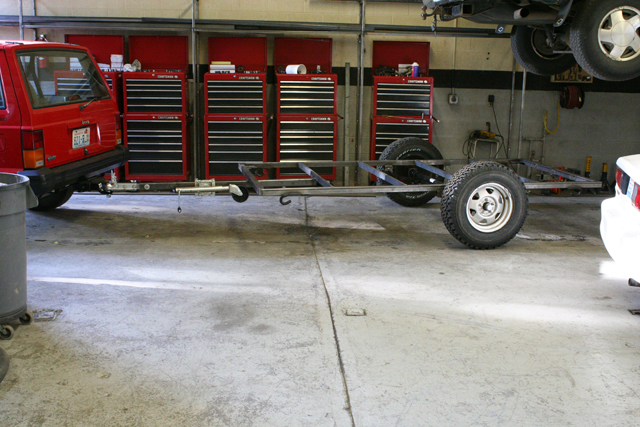
I ordered the 3500 lb axle and springs. I also ordered fenders from them since it was easier to do it all at once and helped my shipping rates. I got a 75″ hub to hub axle. This would allow about a 1.5″ gap between the fender and the side of the trailer. This gap will make cleaning mud out of the wheel well easier. Plus, I want to be able to remove the teardrop body from the chassis for maintenance and to use the trailer for other utility needs. This gap allows for those needs.
I chose to over-sling the axle. With the wheel & tire combination I have, I already have 14″ of clearance. With the axle over-slung, the frame is within 1/2″ of the height of the Jeep. When Senior Management and I decide to put a lift kit on the Jeep, then I may under-sling the axle for an additional 4″ of clearance (approximately 23″).
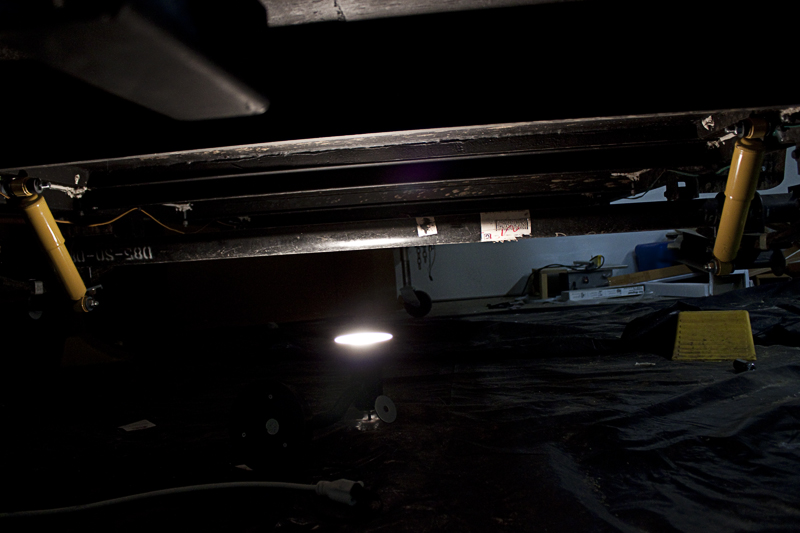
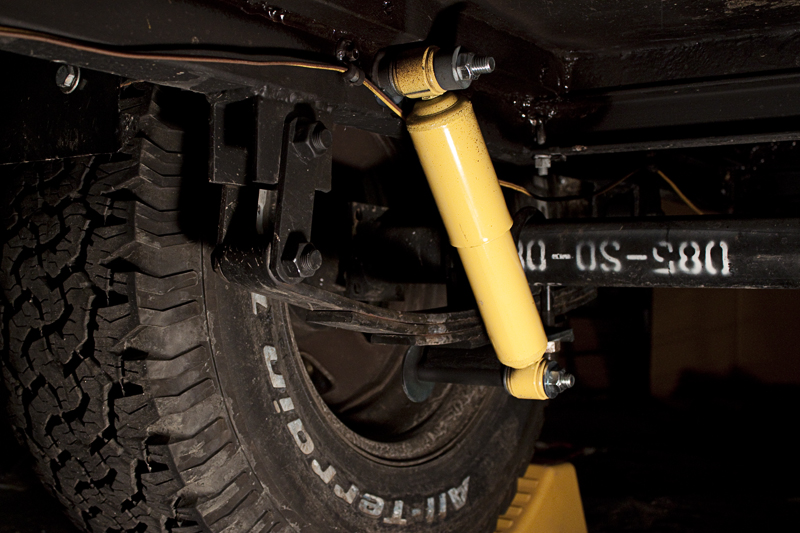
After the first trip in the jPod, I was impressed with how smooth the ride was. However, since I plan to use it in off-road situations, I decided to install a shock system just to tame the springs a bit. On the street, it rides just fine but it is probably a bit hot for off-roading. I plan to install the Monroe RV & Trailer Retrofit Kit (note: as of 2014 Monroe no longer makes this part).
Get the Right Axle for Your DIY Teardrop Camper
Wheels And Tires For The Chassis
I already had four 15″ Jeep wheels that I knew I could use for this project. I picked the two best wheels and had BF Goodrich All-Terrain A/T (235/75 R15) put on them. These are a common off-road tire that sports a triple reinforced sidewall. It is also the tire I hope to put on the Jeep after my current set of tires wear out.
The reason for standard automotive tires is two-fold. The first reason is the obvious off-road application and the second is so I only have to carry one spare tire that will fit both the jPod and the Jeep. My only disappointment is that the bearing caps on the trailer axle stick out too far to put the Jeep hub caps back on. However, I do take the Jeeper’s code to heart (“Jeeps are not made they are built”) and plan to figure out a way to make those hubcaps work sometime in the future. I also plan to add brakes in the future but for this camping season do not plan to need them. The radius of the wheel & tire combo is 14″. Add that to the spring height and the frame of the trailer will have about 17″ of clearance (perfect!).
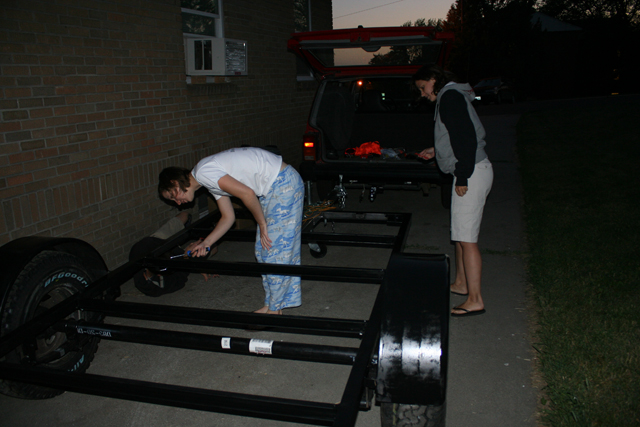
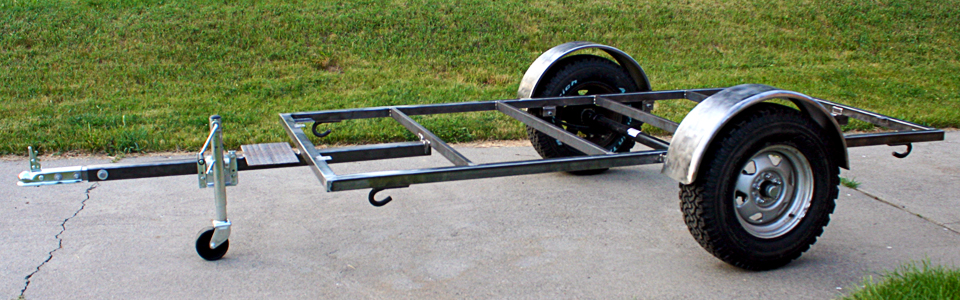
Fabricating The Teardrop Trailer Chassis
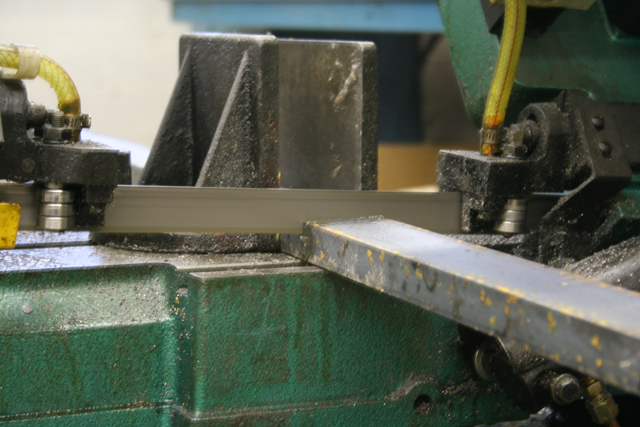
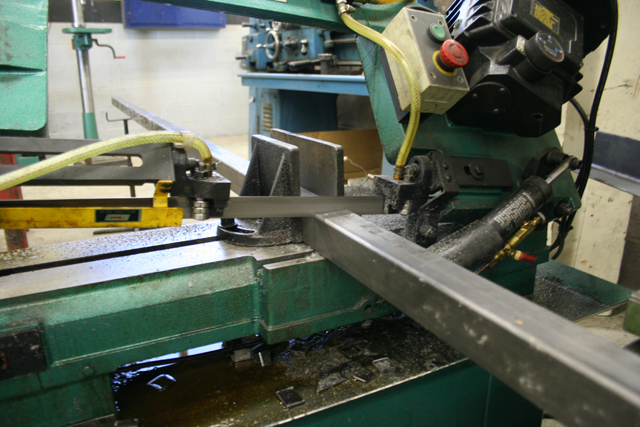
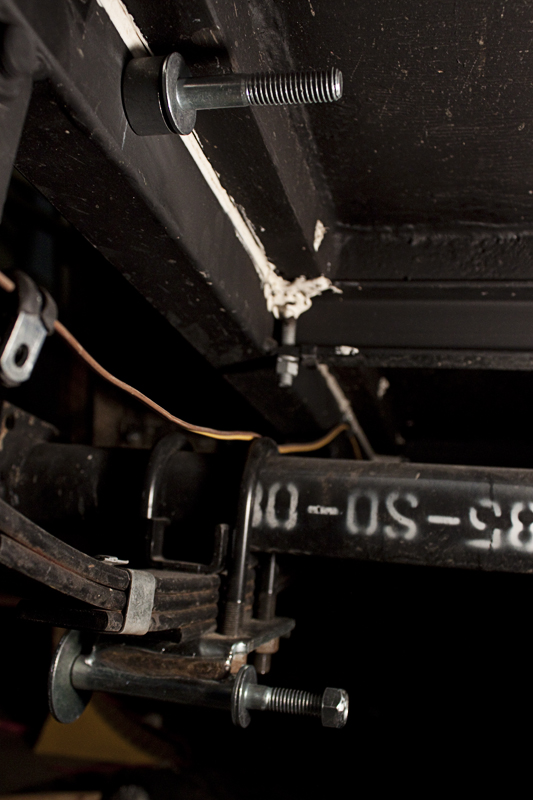
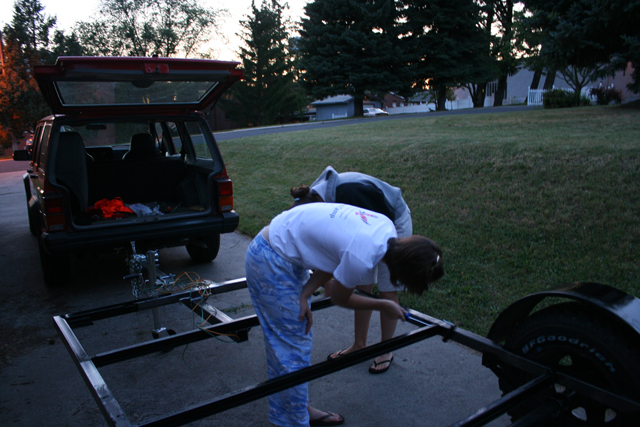
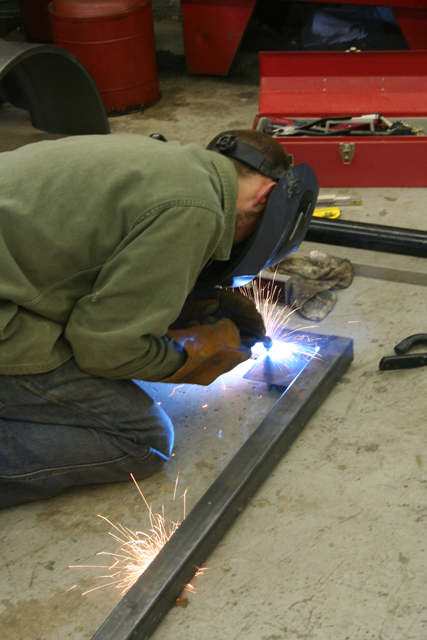
I wanted this trailer to be useful off-road behind a Jeep so a stronger chassis is necessary. I’m a teacher and called up the school’s Industrial Technology teacher and found that I could get the steel for the chassis through the school at a discounted rate (very NICE). I ordered 3/16″x 2″x 2″ square steel tube for the outside of the trailer and 3/16″x 2″x1″ channel for the internal structure. The channel will provide nice places to attach the body with 3/8″ stainless bolts.
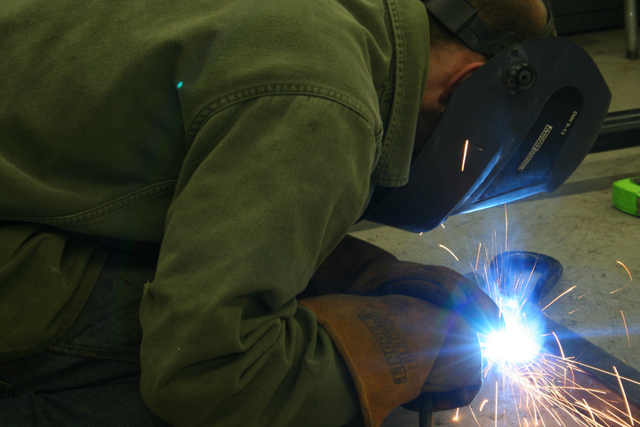
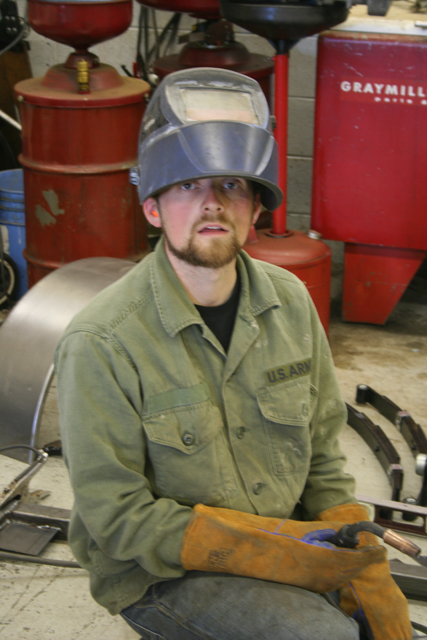
Once the 20′ sections arrived, I started fabricating. I haven’t welded for about 11 years so I took a day to practice and then got right into it. Getting the frame square was tricky because my cuts weren’t perfect. It would have been much easier to have it professionally cut but I was determined to DIY this thing.
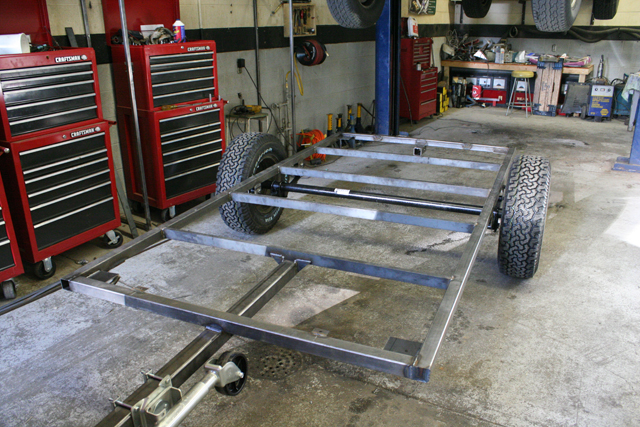
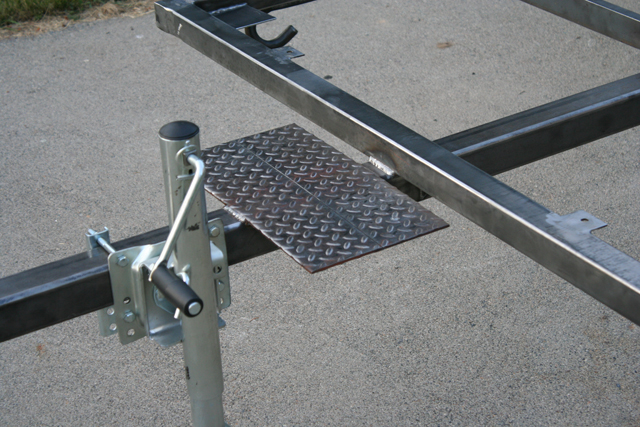
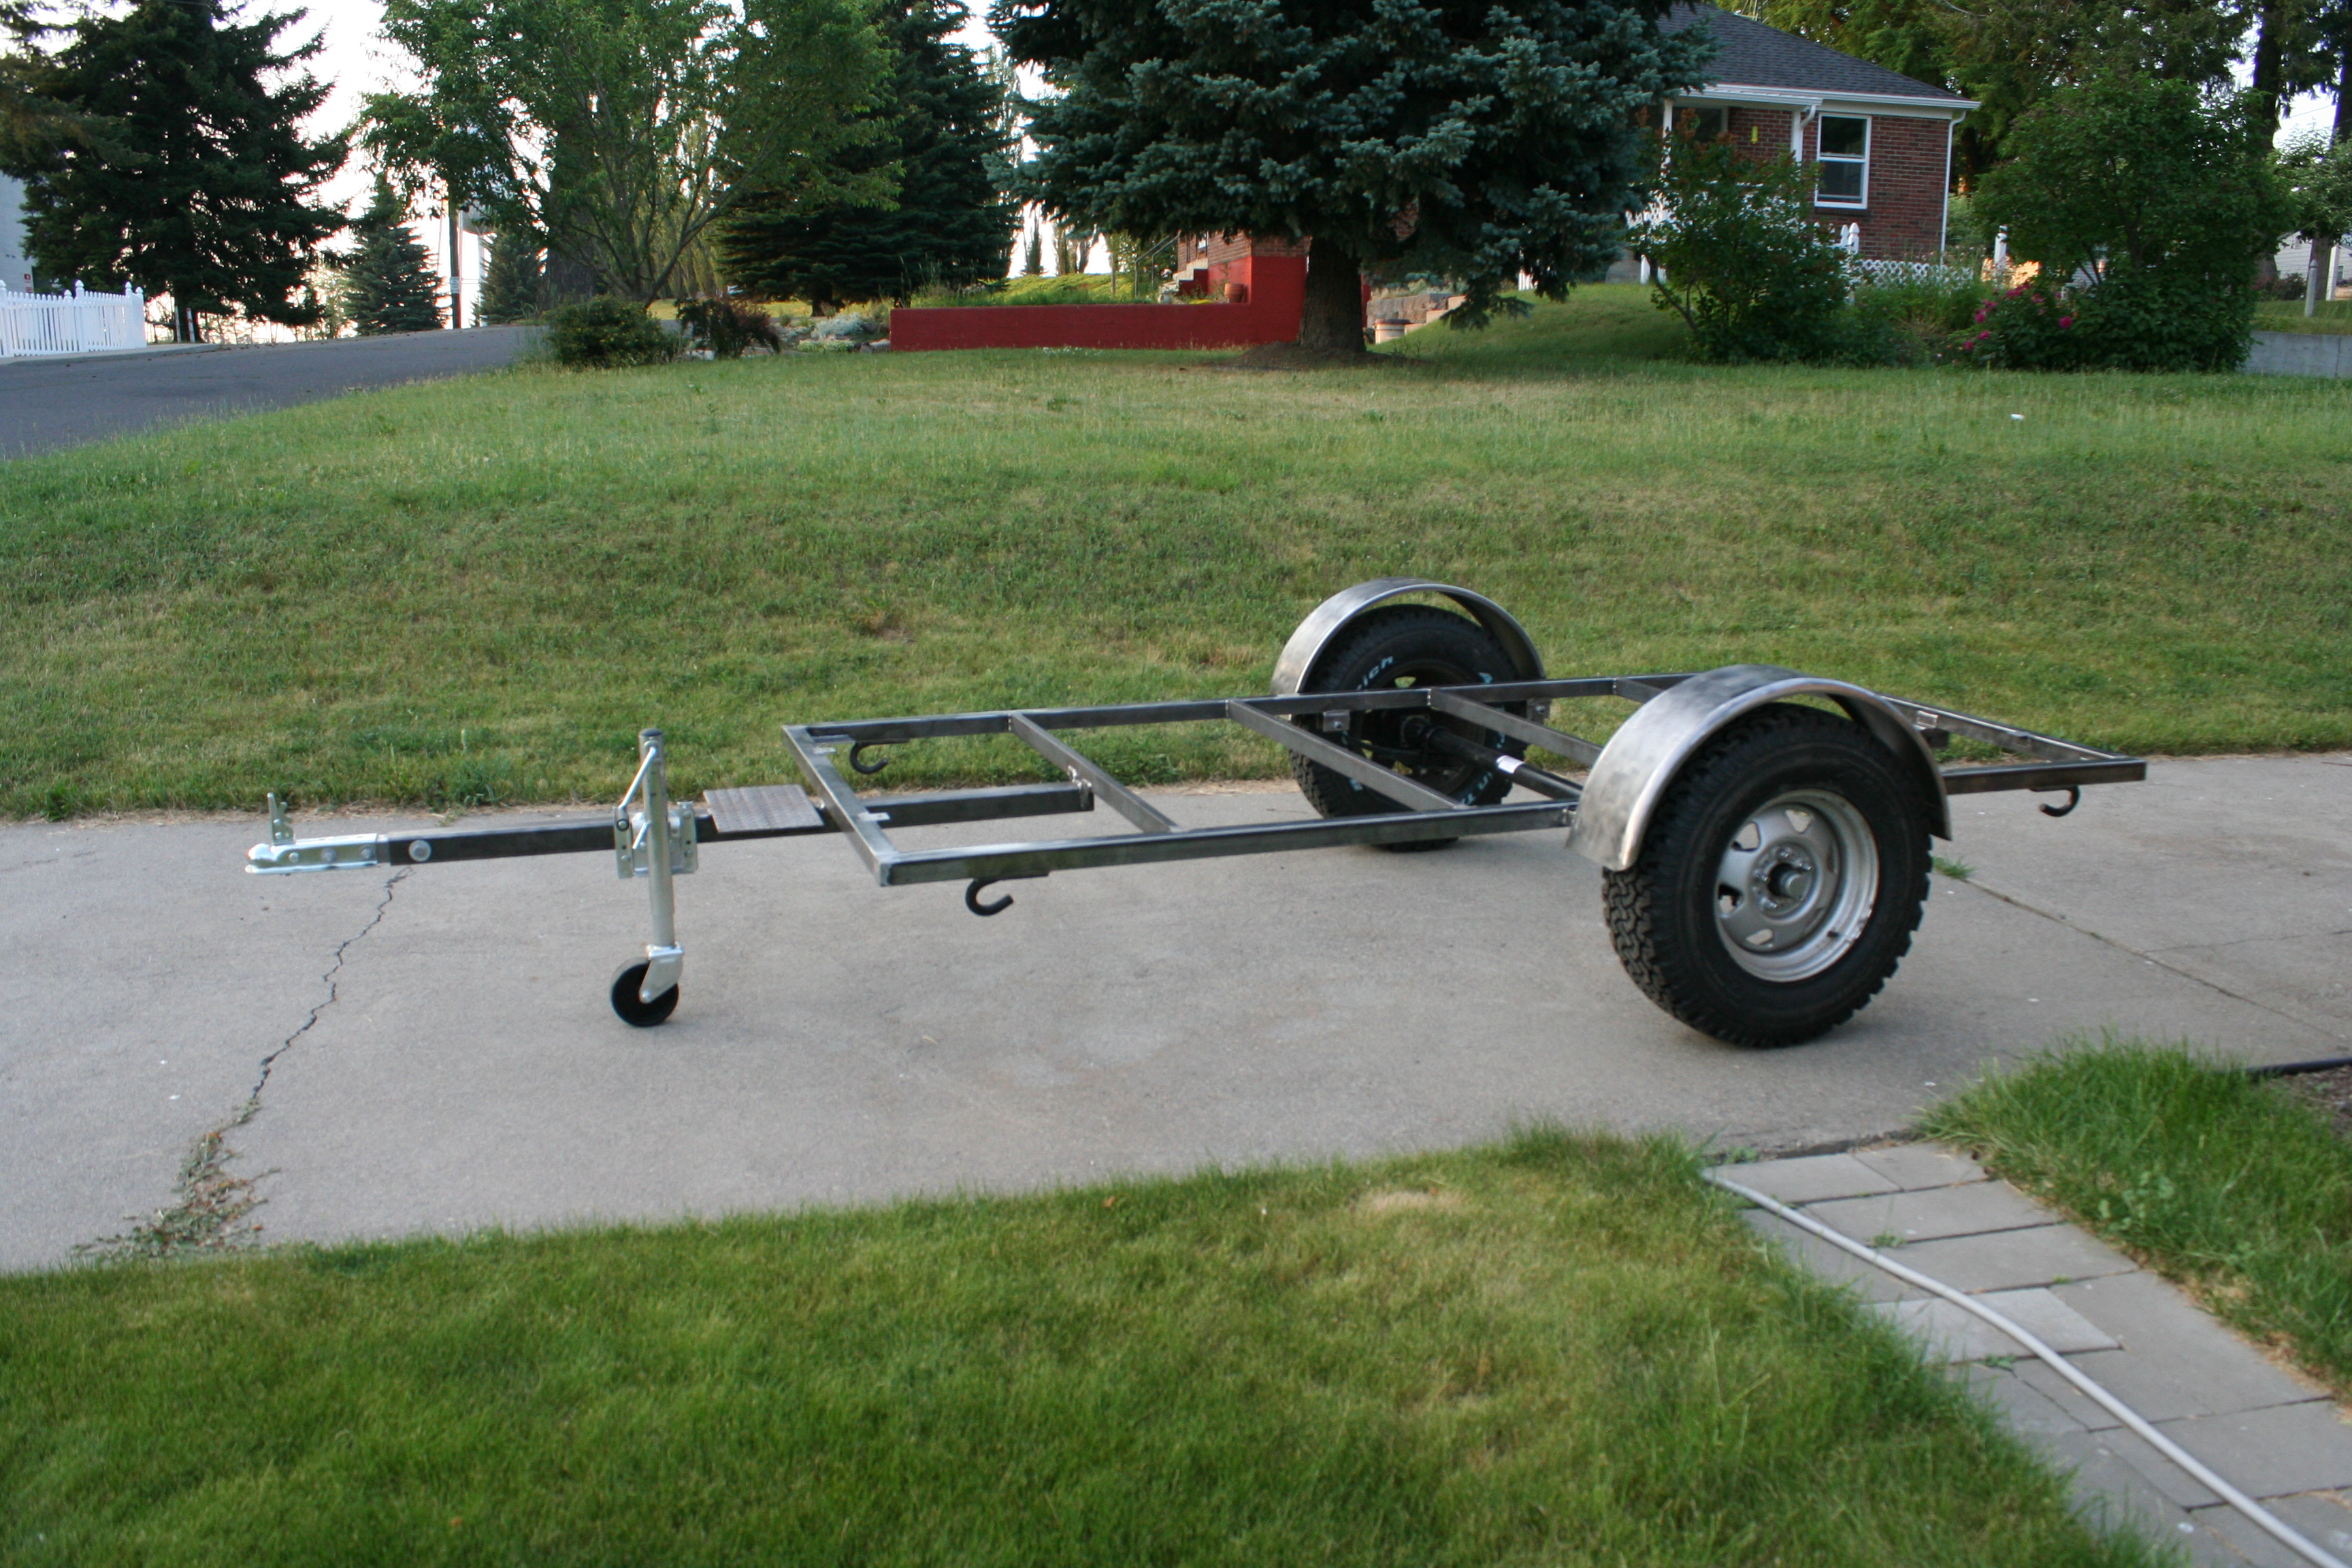
After the frame was square, level, and welded into place, I welded four 4″ plates into the frame (at each corner). These will be for long stabilizer jacks. So far, I have only purchased two stabilizer jacks but I can add two later – if we think it is necessary.
Save Time With A Laser-Cut Steel Trailer Frame

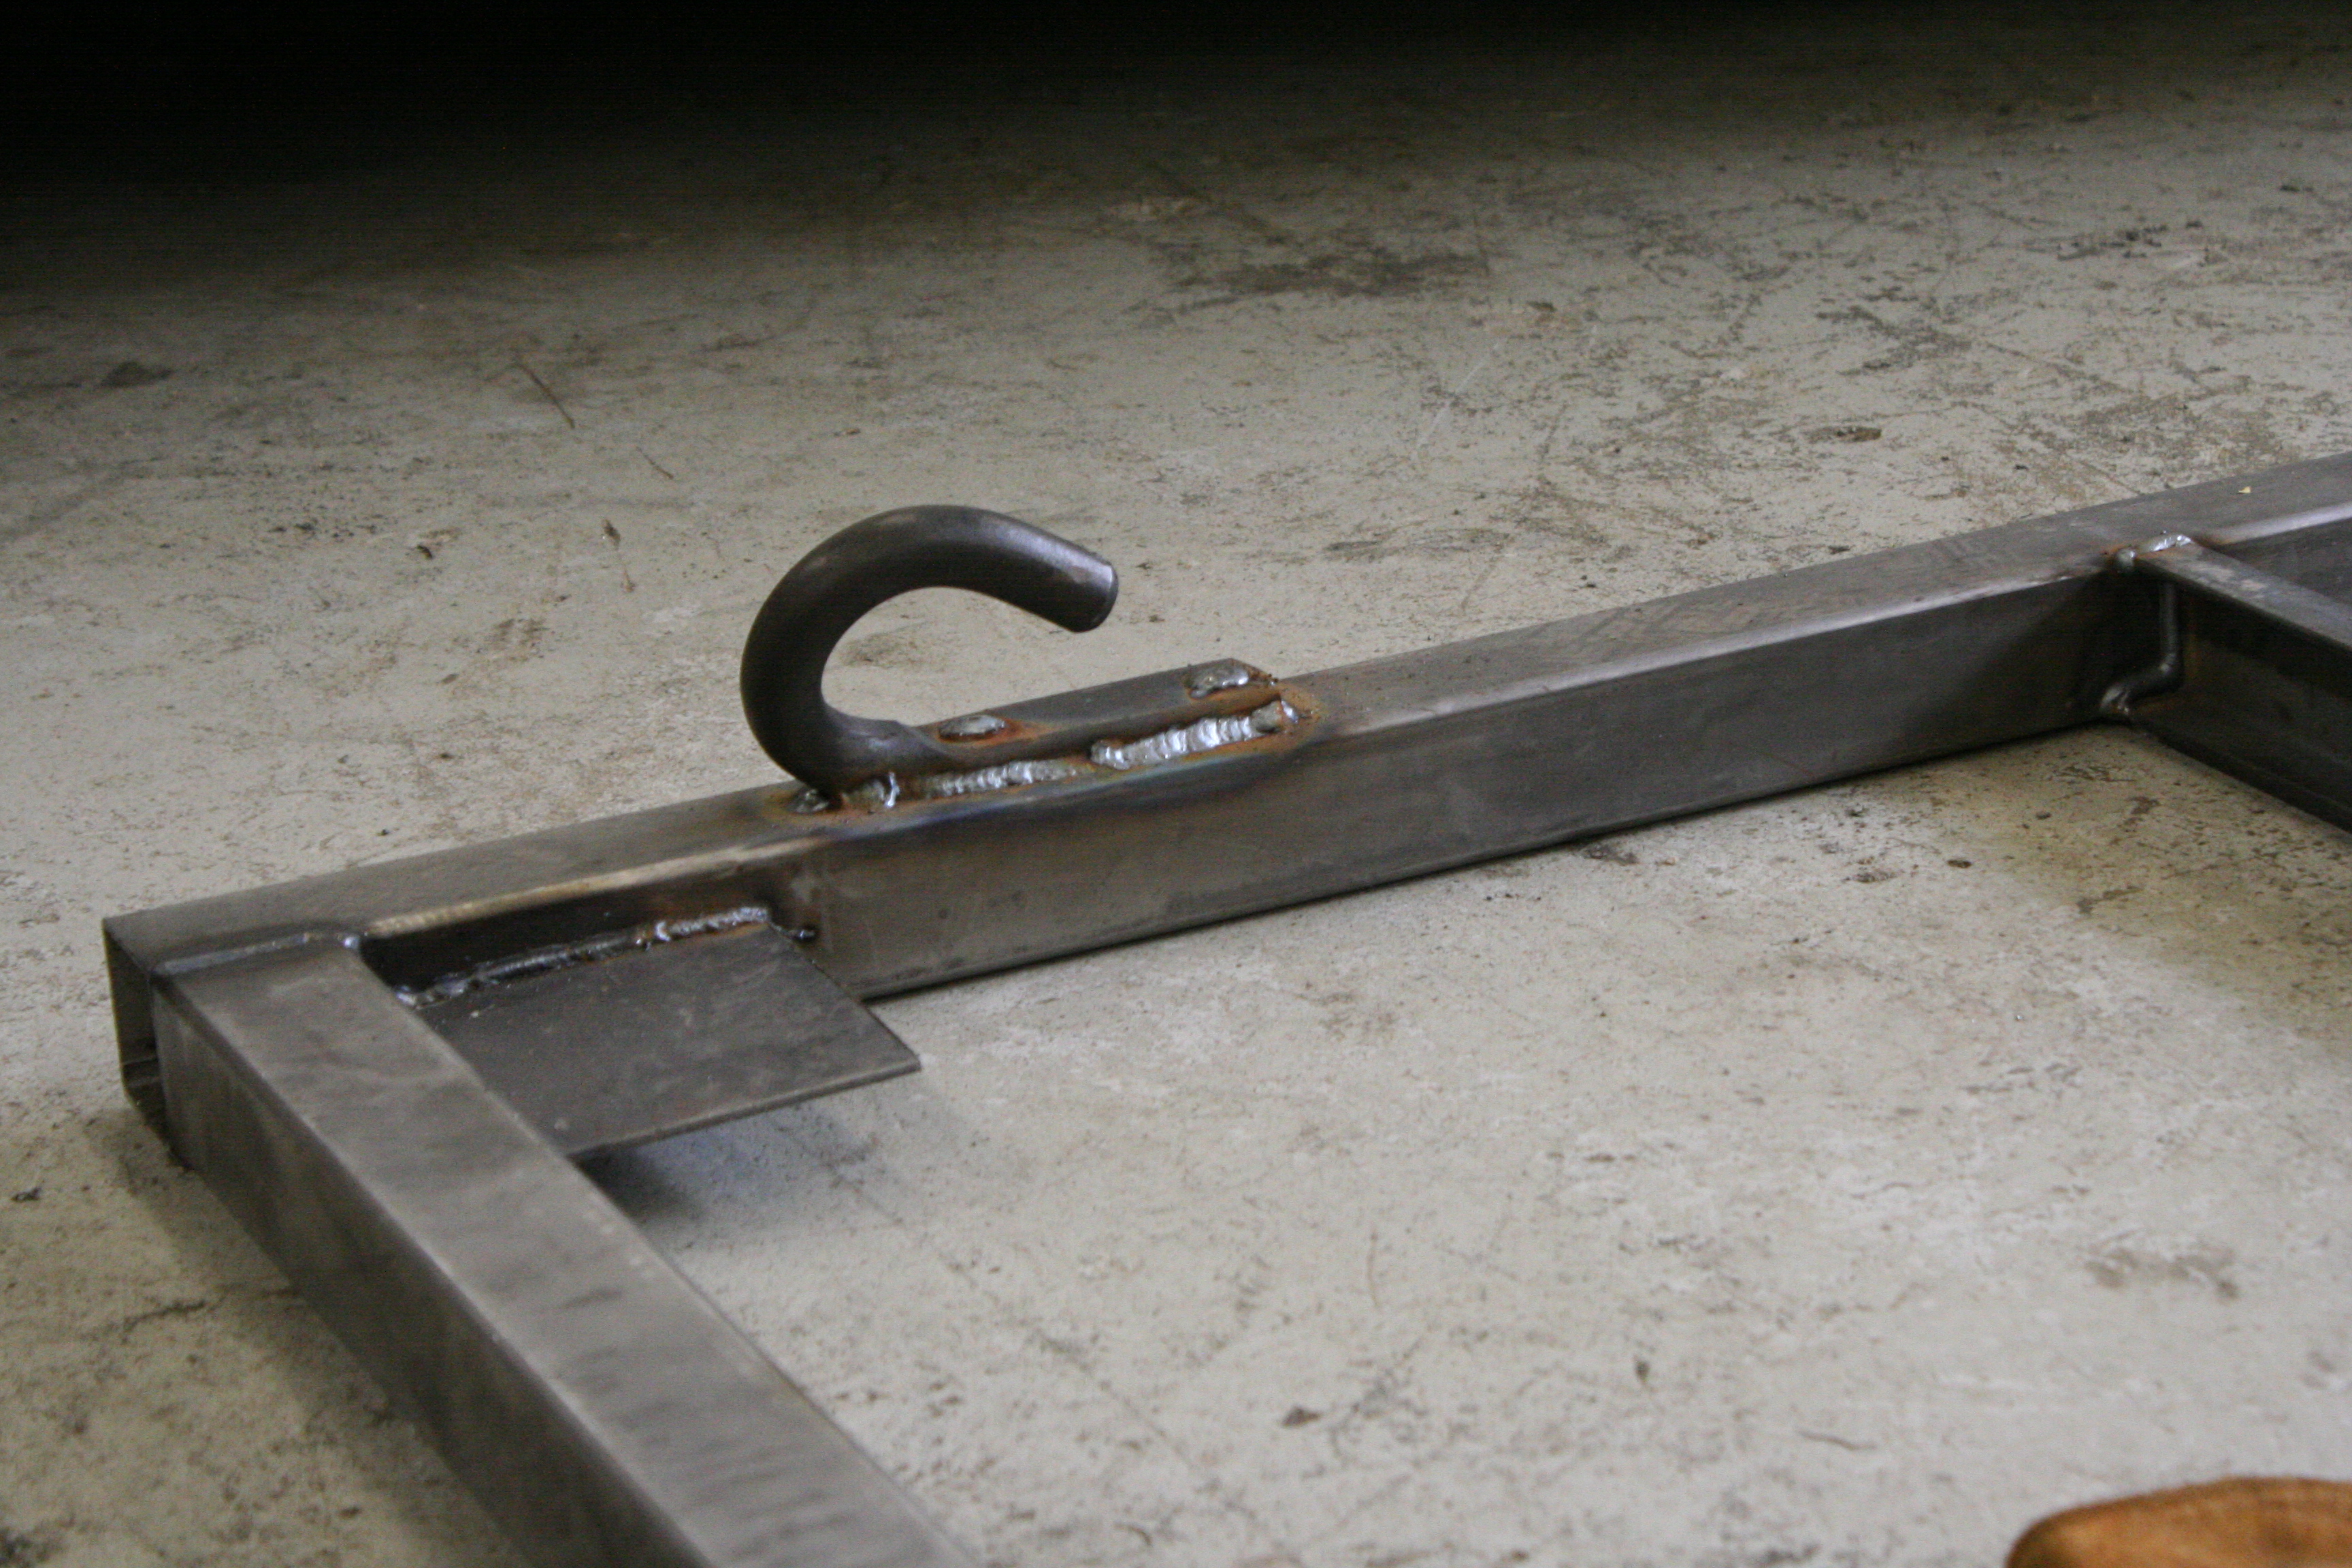
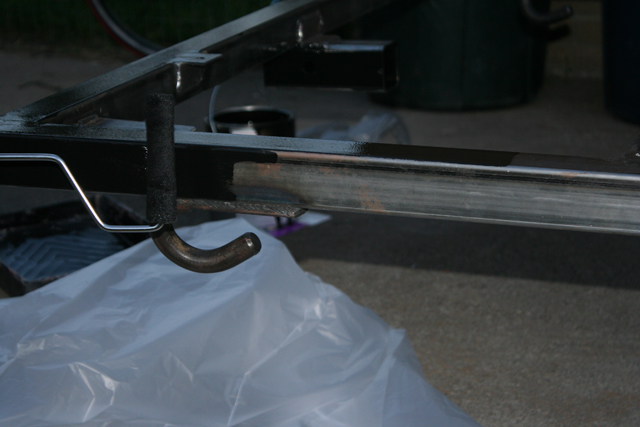
I added the cross members with the channel facing the rear of the trailer so they won’t collect mud and dirt. I also added a few off-road features: Four tow hooks (from two Blazers at a wrecking yard. They are WAY too burly but were $2 each), a hitch receiver on the back of the frame (easy place to attach a wench or pull the trailer backward if necessary. I have also considered making a table which could attach here.), and a steel battery tongue plate (most commercial tongue plates are wimpy. This one would survive a nuclear explosion). All in all, the frame is overbuilt.
It should be able to take the unusual forces of Back-country driving without any problems. Plus, I plan to use it as a utility trailer to haul wood and other heavy objects. Overbuilt for a teardrop trailer but I’m planning to multitask with this trailer so it is beefy.
As almost an afterthought, I capped the ends of the frame. I was thinking about water crossings and standing water isn’t good to haul around inside your steel framed trailer. I don’t plan to do deep water crossings but up to 15″ could be possible without the trailer being swept away.
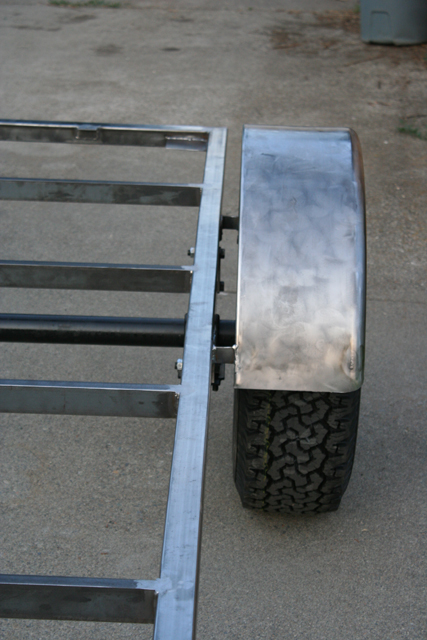
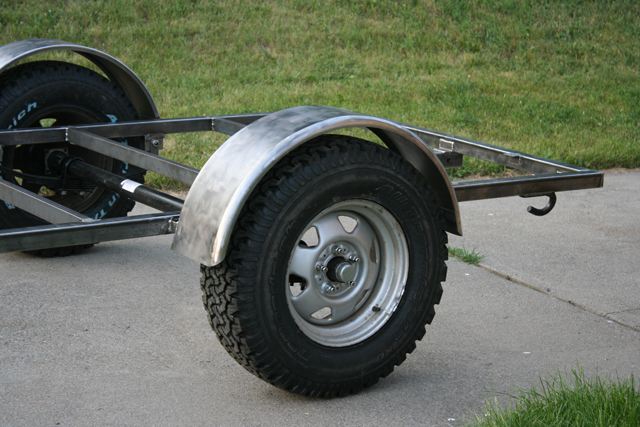
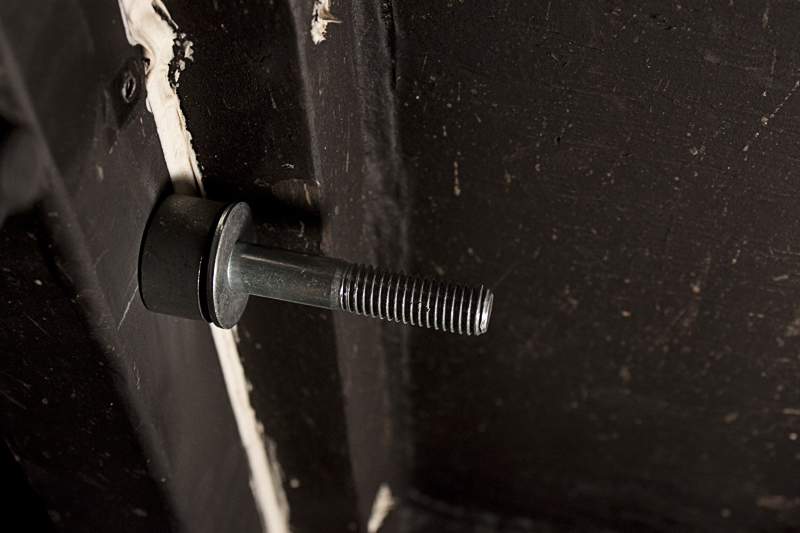
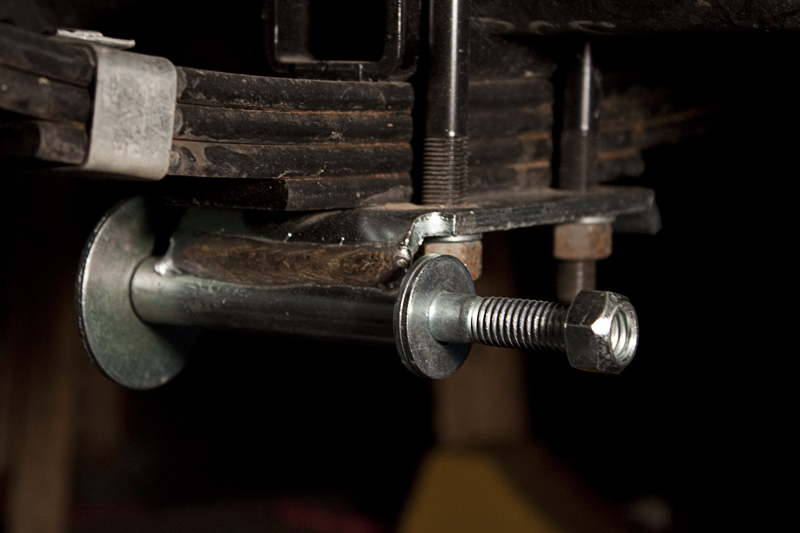
I chose to go with round steel fenders to match the round teardrop body profile and a round window I plan to install. Originally, I welded the fenders to the frame, then I chose to bolt the fenders to the chassis. This way I can remove them to access the side of the jPod if there is any paint that needs repairing or easily replace if they get damaged.
The Shocks
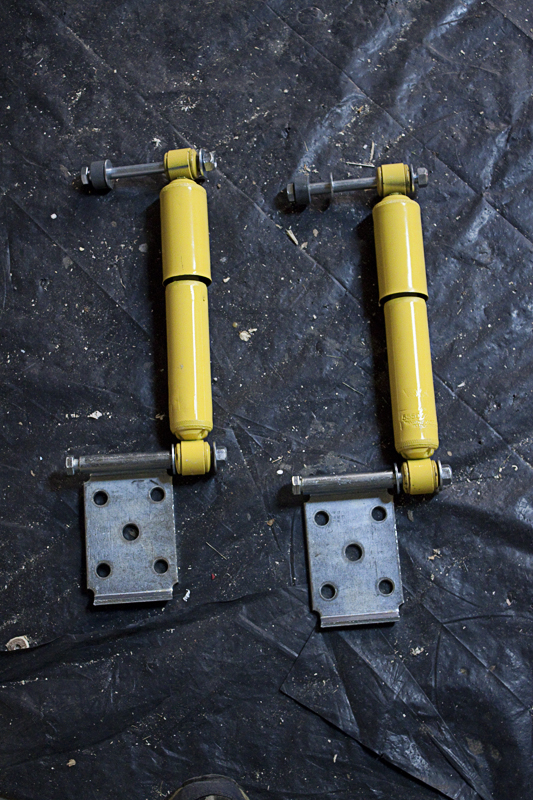
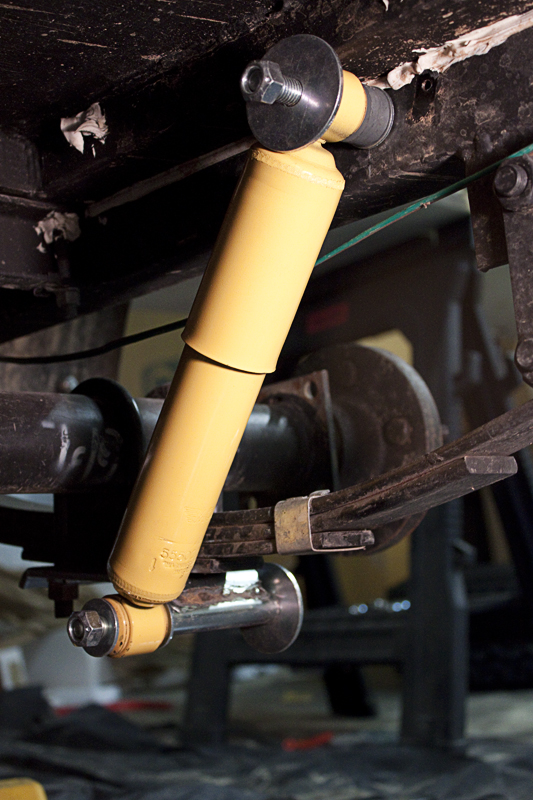
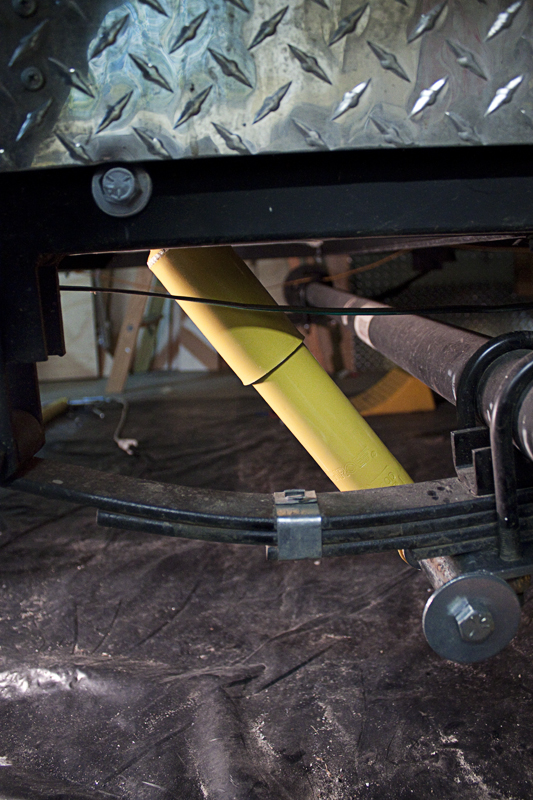
I chose to go with Monroe’s Trailer Retrofit Kit. I used the jPod for a camping season and noticed that it rode fine on paved roads but got jumpy on bumpy or off-road driving. The Monroe kit is exactly what it took to get the job done. I am very happy with their product. Here’s my write up of the kit.
Paint and Finish
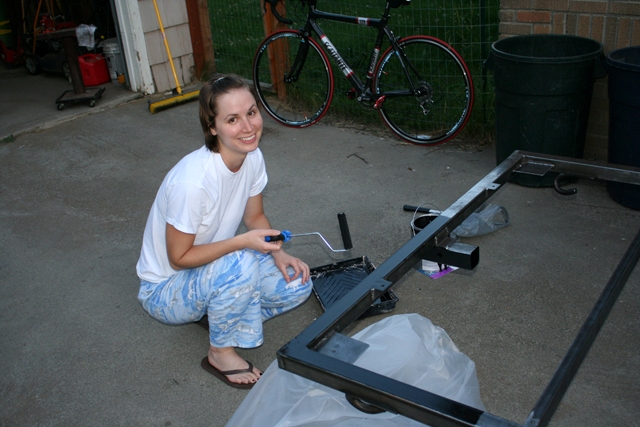
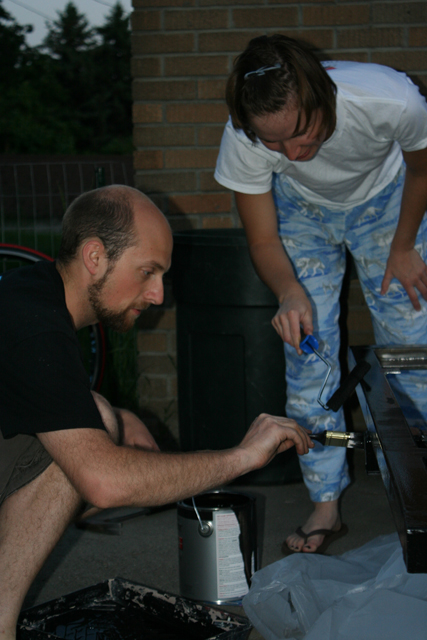
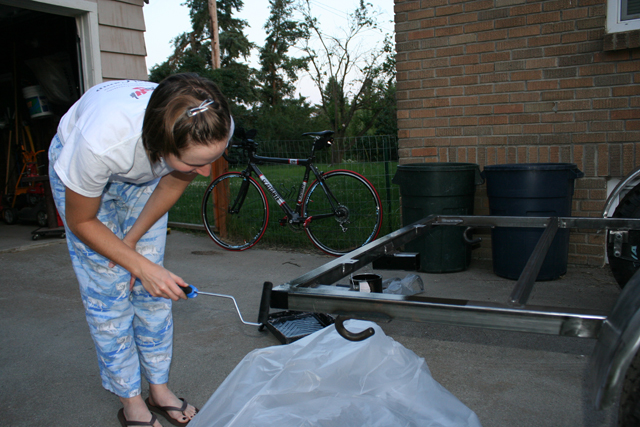

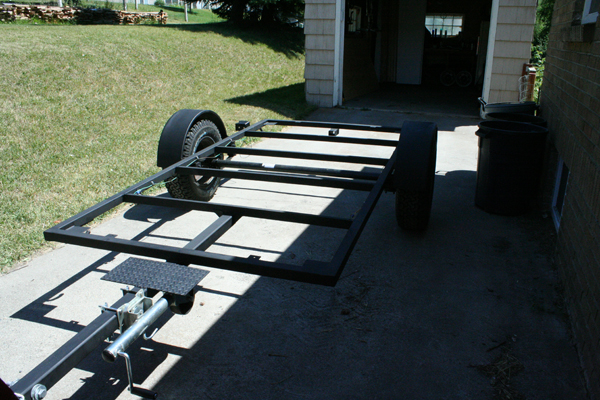
I ground down all of my welds that needed to be even with the frame (and some welds that sucked). Then I brushed the entire trailer with a braided brush that I put on my hand grinder.
Senior Management and I finished the chassis with Rust-oleum’s Professional Flat Black brush-on enamel (4 coats – 5 on the fenders). I have considered having it powder coated but right now the price is more than the budget for this project can take.
Since I am designing this trailer so that it can be used for multiple purposes, I could, in the future, drive out from under the body and have the chassis powder coated. We’ll see how happy we are with the enamel until then.
When I attached the brackets for the lights, I put silicone between the bracket and the frame and then screwed them together with a self-tapping sheet metal screw that comes with a rubber gasket for sealing. I also put two coats of undercoating under my fenders to help them last longer with lots of rock, dirt, and grime.
Running Lights
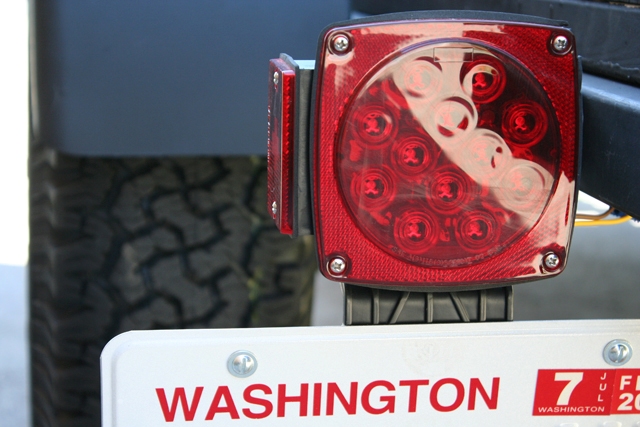

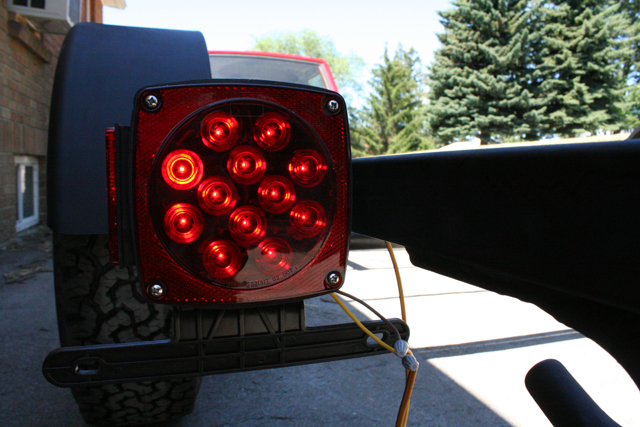
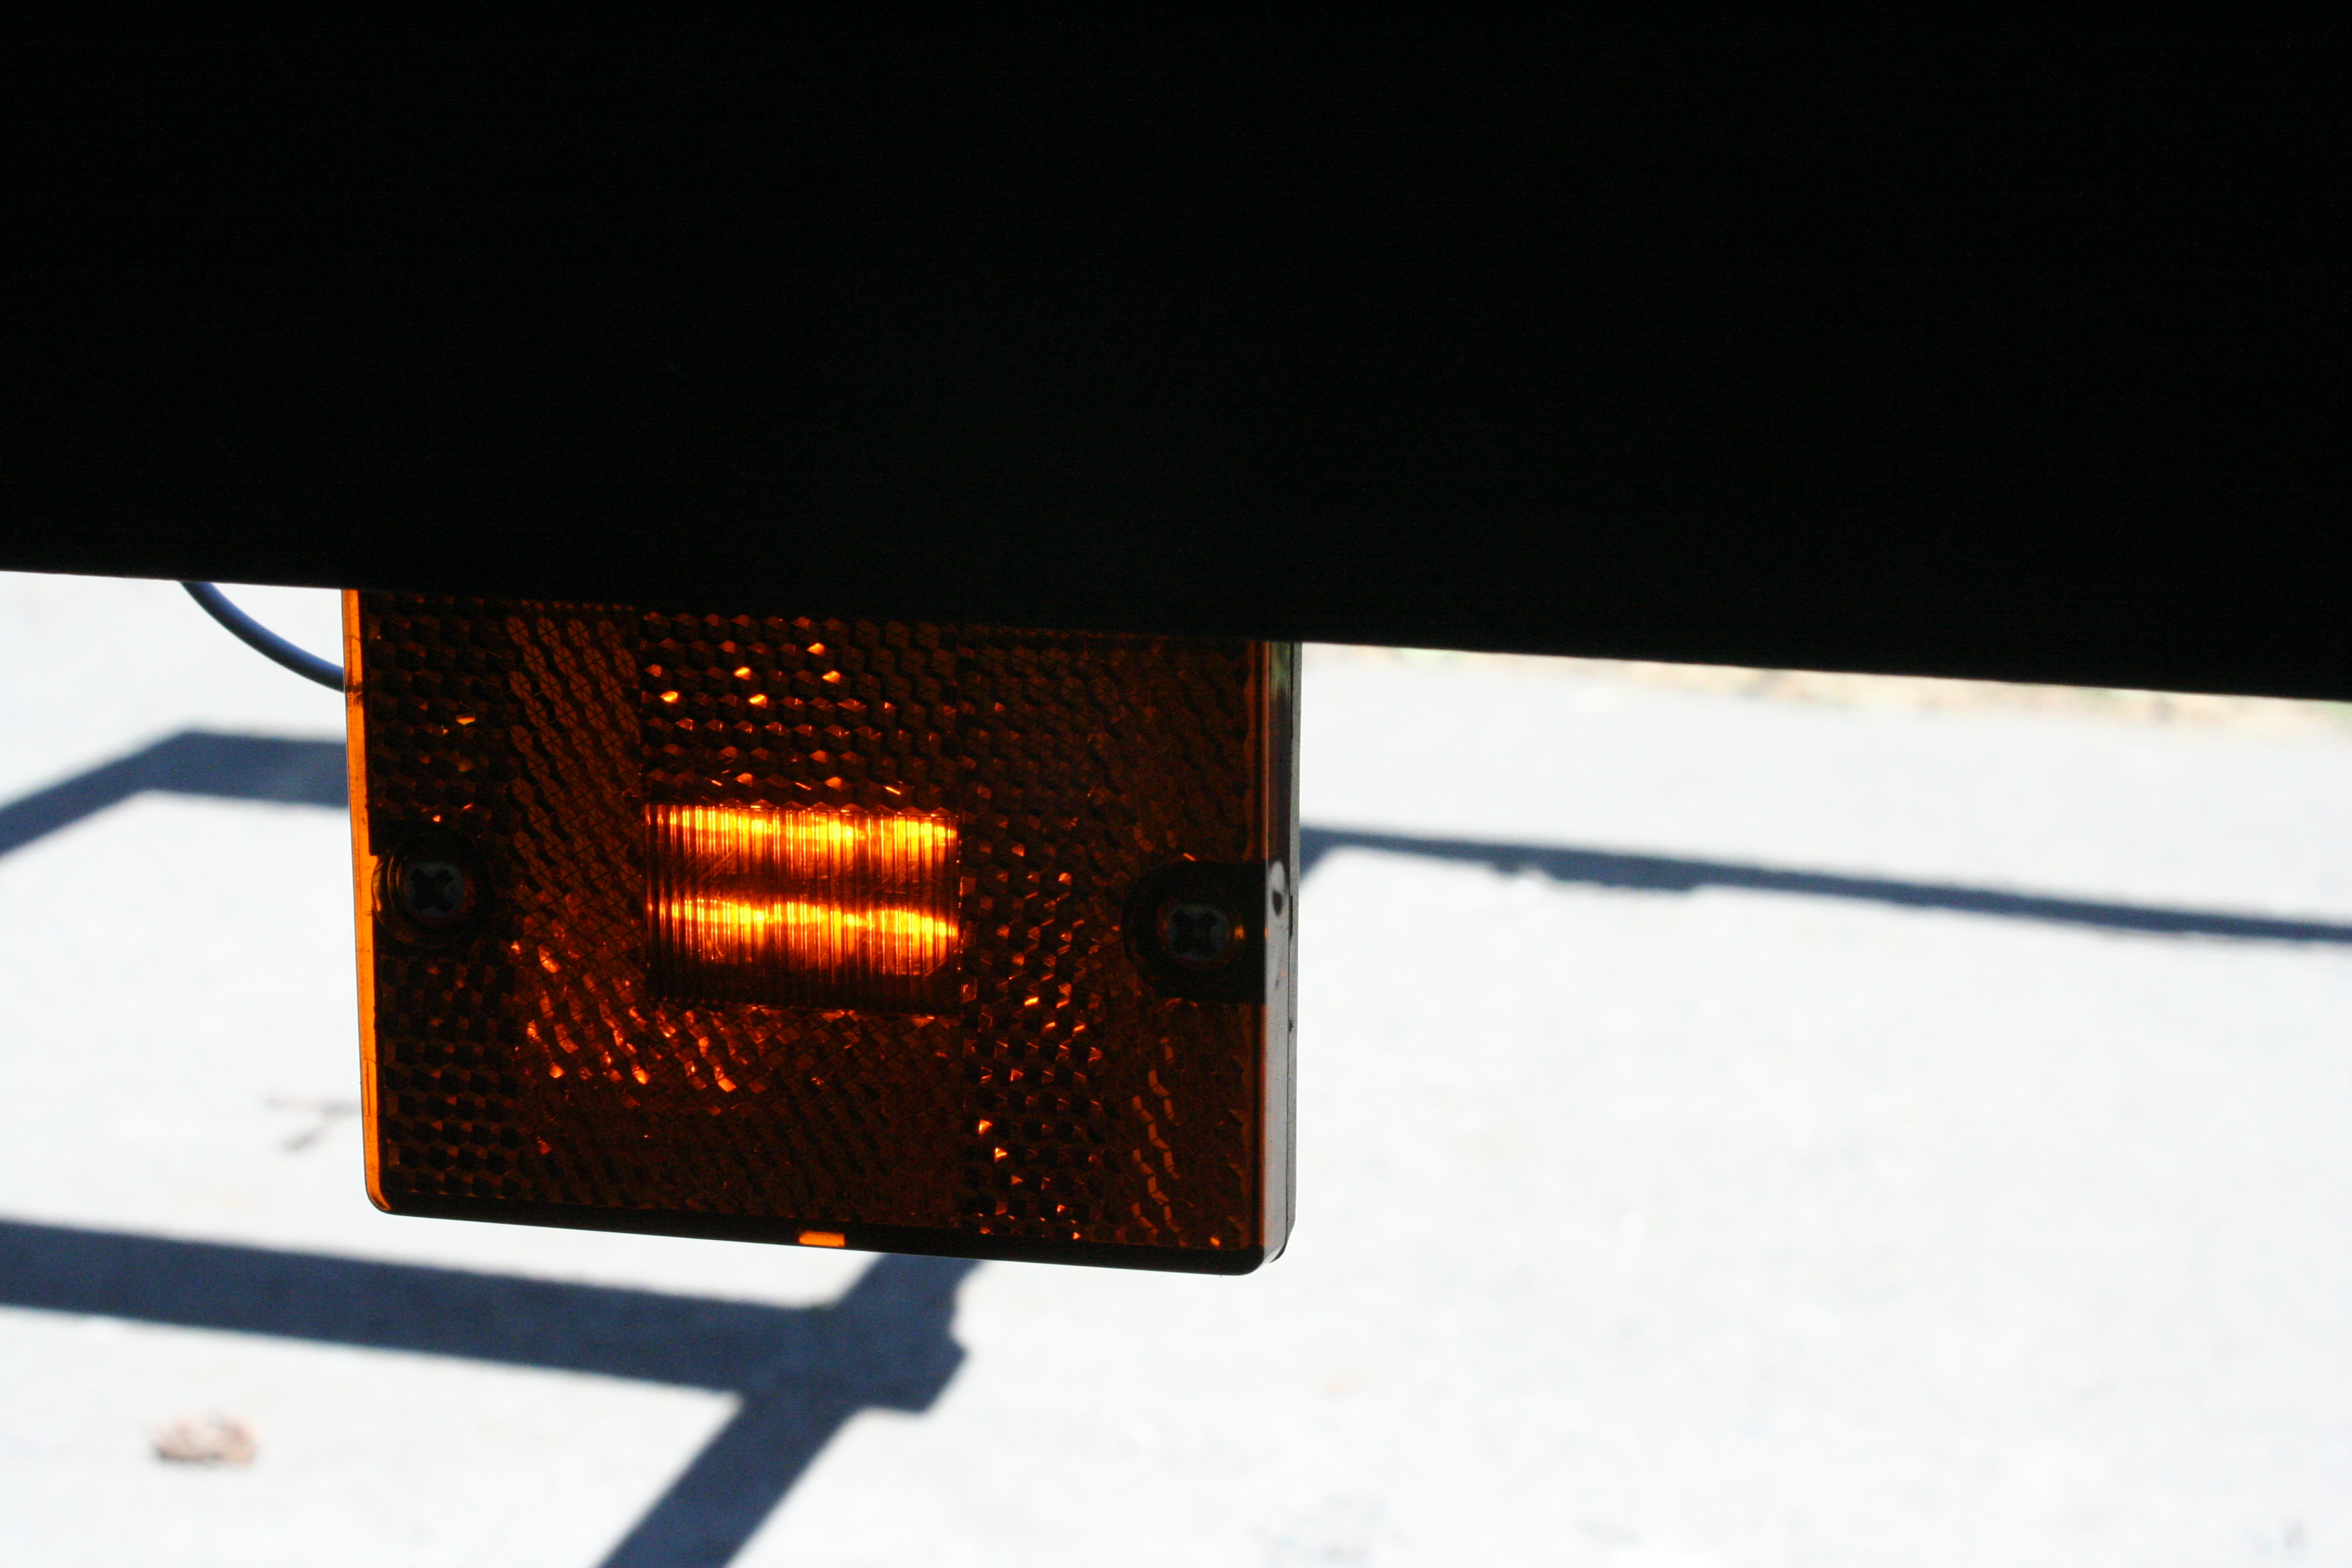
One of my requirements was to have submersible LED trailer lights. I question the durability of the wiring harness. I’ll use it for now but I might make my own in the future. Everything works great. The only thing I changed with their kit was the wire nuts for the tail lights. I replaced them with some real wire clips & dielectric grease.
NOTE: I did make my own harness for this trailer 2 years after building. This one fell apart with off-road use
Get a Quality Wiring Harness Kit & Wiring Plans
How Long Did It Take To Build?
Collecting all of the parts and cutting all of the steel took several full days. Once I had everything, the welding, grinding, brushing, painting, bolt-on hardware, and wiring took about 87 hours.
Washington State Licensing and Title for A Home-Built Trailer Chassis
Washington state requires homemade trailers to be inspected. This is a typical government process that takes about 30 days to get an appointment (I called on July 7). I should have asked for an appointment before I started this project. However, the State Patrol called me and set up an appointment for July 18. Only 11 days!
To get a title in Washington, I need to take a few things with me:
- All the receipts for all of the components to the trailer.
- Have it weighed (the waste to energy plants will do it for free)
- Some $ (because I expect some fees -although they didn’t tell me about any)
The inspection got me a title and VIN# to put on the trailer chassis. As long as the trailer has a deck on it, WSP can issue me a title. Without it, they’ll just give me a 3-year permit which I’ll have to renew.
I got a title and the trailer passed just fine. The officer thought it looked good and beefy. She even liked the removable tongue! It is licensed.
Interesting fact: In the state of Washington, it is cheaper to get a marriage license than it is to license a trailer.
Here are some final specs:
- Total Weight=340 lbs
- Size= 5′ x 10′
- Tongue length = 39″


Good job. I feel like I’m missing out by not being there to watch the process.
well done .this what I been looking for can you please email me the plans thanks mery christmas
I uploaded the plans in full resolution on this site. You can just click on them and print them out (See link below). I hope this helps. OH, also, I don’t have your email address.
http://jpodbuild.files.wordpress.com/2008/07/trailerplans.jpg
Would like to build this Trailer as you have it drawn, well done. How is it working out for you?