
You may already have a plan for your teardrop frame but what are the top 5 most used trailer frames -and their pros and cons?
Determine The Best Trailer Frame:
The opinion that matters the most to me when I purchase a new vehicle is the mechanic I call before purchasing. That mechanic fixes all of the problems with that vehicle. I can then make an informed decision. When it comes to teardrops, I’ve seen it all in the past 15+ years.
Top 5 DIY Teardrop Camper Frames
Through the years, we’ve worked on a variety of people’s DIY teardrop trailer frames – in addition to making our own. I put them into 5 categories.
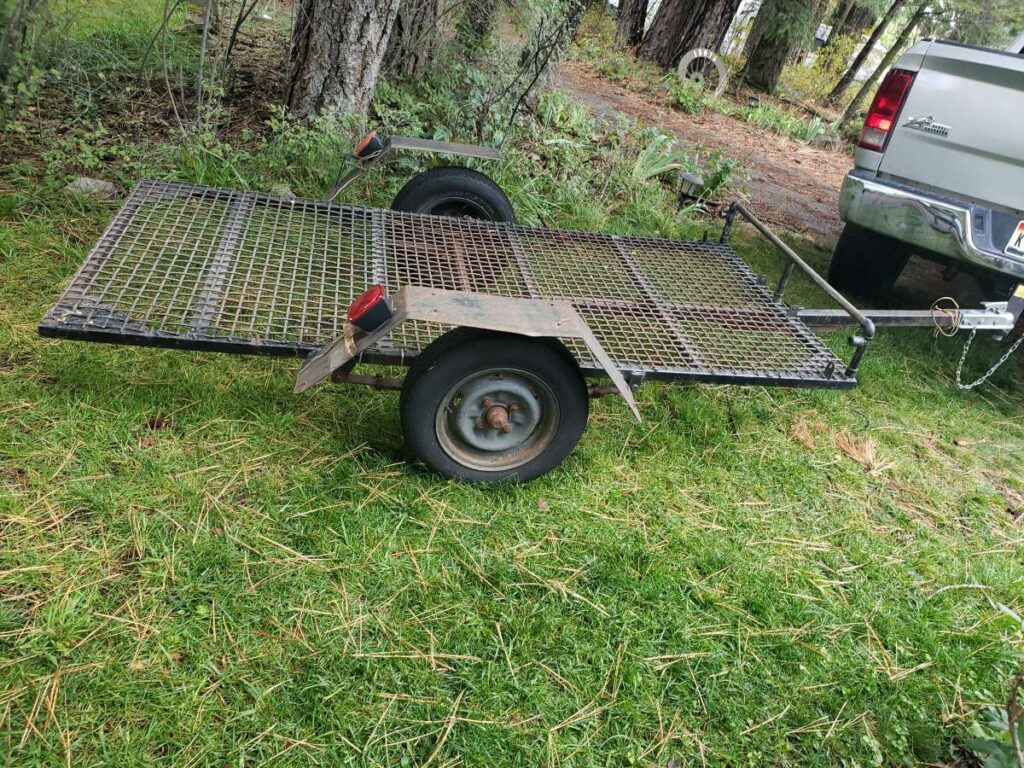
Trailer Frame from Repurposed Materials
This is probably the earliest trailer frame made for a teardrop trailer. No one knows who made the first trailer but it was likely made from repurposed materials in someone’s barn or garage in the early 1900s (Watch the Documentary to Learn More). This is still a great way to make a trailer. It could be scrap steel or a dilapidated old trailer that is repurposed.
The PROS
- Considerable cost savings – reusing metals or axles can be a big savings
- Total creativity in making those parts work together into a frame
- Get an inexpensive welded trailer frame
The CONS
- Damaged Materials
- Rusty or Damaged finishes
- a lot of time figuring out how to make the materials work together
- Metal Working Tools/Skills Required
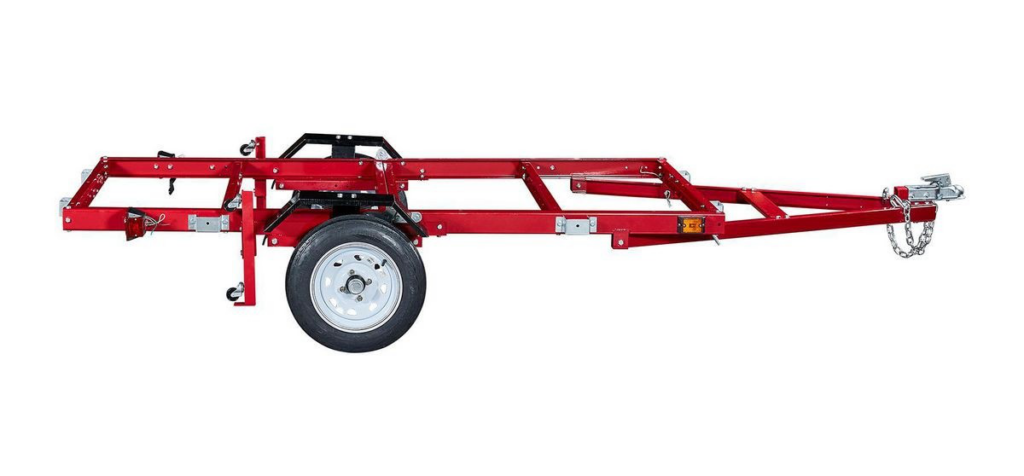
Bolt-together Utility Trailer Frame Kits
Almost all of these are from overseas and purchased from a mass tool importer. They are usually a red or black bolt-together kit that has a 1000 – 2000 lb capacity. This frame comes with wheels, tires, and an axle. This kit is also quite popular with teardrop camping enthusiasts.
The PROS
- No Metal Working Skills Required – This kit bolts together
- Fast Assembly – Can be assembled in an afternoon. Faster than any other frame in this list.
- Costs Less Up Front – Long-term expenses do start to pile up though.
The CONS
This is where the long-term costs come.
- Quality Control – This imported trailer has changed a lot from year to year. Parts tend to be low quality materials and workmanship.
- Low Quality Finish – These trailers are known to rust and corrode quickly. Refinishing is easiest if it’s done before putting the teardrop body on the frame.
- Thin Sheet Steel Frame – The frame is made from sheet steel that has been bent into channel. Although it works, it isn’t nearly as strong or durable as a forged steel channel.
- 4′ x 8′ Bed Size – Vintage teardrop trailers were mostly 4’x 8′ but most modern DIY builders want a 5′ x 8′ teardrop which has space for a queen sized bed. This frame can be adapted to fit that size of trailer but it does require some creative problem solving.
- Axle Placement – The axle placement on this frame is for a utility trailer. A teardrop’s axle is usually further toward the back of the frame because the galley is typically the heaviest part of the trailer with the bed being pretty light. The axle should be moved back on this kit.
- Wheel Bearings – In the manual for this kit, it recommends the wheel bearings be repacked with grease every 2000 – 3000 miles. This is way too often for most campers but it probably does protect the low-quality axle and hubs.
- No Highway Tires – In the manual for this kit, the maximum speed for this kit is 45 mph. The reason is that the tires are not safe for highway speeds. A new set of tires (maybe wheels) are a requirement for practical teardrop trailer use.
- Bolts that Loosen/Wear Out – The hardware in this frame requires regular maintenance or replacing. Bolts will loosen over time. Lock washers, nylon locking bolts, and thread lock are all good ideas to help keep the frame together over time.
Although this kit has a long list of cons, it is worth noting that not every kit will have all of these issues. Knowing what you’re getting is more than 1/2 the battle. The top 3 most important upgrades that we recommend is to repaint/finish the frame, lockdown all of the fasteners, and upgrade the tires.
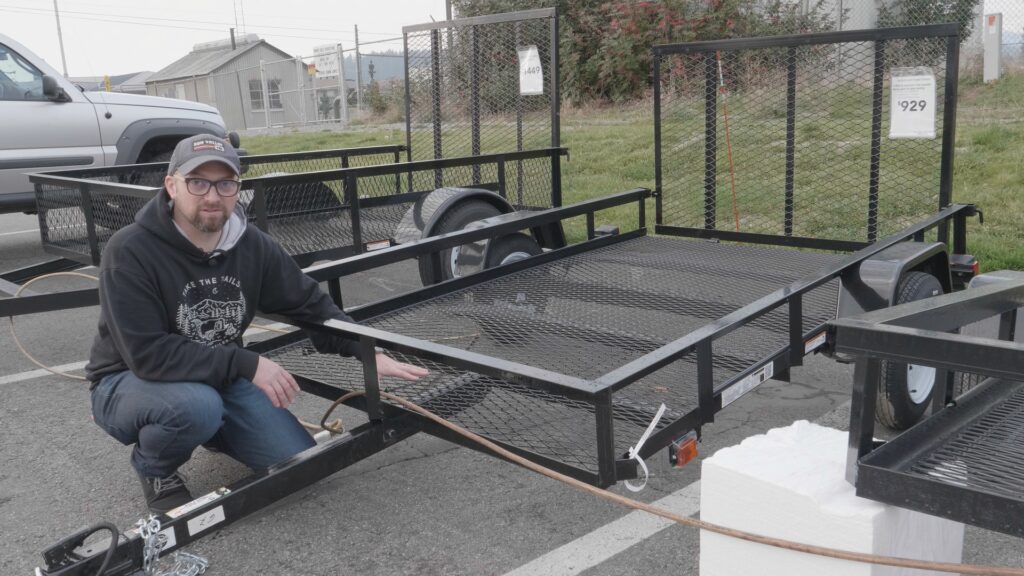
Commercially-Welded Utility Trailer
Usually, these utility trailers are purchased from a big-box hardware store. They are another pretty common trailer frame solution for teardrop builders.
The PROS
- Pre-Welded Trailer Frame – There is more strength and less maintenance required for this utility trailer frame than the bolt-together utility trailer.
- Pre-painted/finished – Usually the paint or powdercoat on these frames is pretty good and it’s already done!
- Highway tires – These usually come with highway rated tires (not always, but usually).
- VIN/Serial Number – These trailers are usually government approved. No inspections needed. Just sign some papers and drive away.
- Local Customer Support – This is a big deal. These trailers are typically welded in a local region. That means that you can call the company with any questions or requests for parts. As the frame ages, this becomes more valueable.
The CONS
- Usually Modified – most teardrop builders will cut the top rail and fenders off of this utility trailer. Both the top rail and fenders provide structural strength to the frame. After they are cut off, the bottom deck requires reinforcement (which can ruin the paint).
- Bed can be too wide – These trailers do come stock in a 5′ x 8′. However, if you want the frame to be hidden under the trailer body, you’ll have to make your trailer body wider than 60″. That makes skinning the roof and finding a longer galley hinge a bit tougher. Thankfully, we have a longer hinge!
- A mix of axles – Before purchasing, check the origin of the axle. If it is an imported axle, its a bit of a gamble on the quality. If you find that the axle was made in your local area or country, that’s good news. You can get parts for it as it wears through the years.
- The Axle Needs to be moved – Like the bolt-together kit, the axle placement on this trailer is too far forward for most teardrop trailers.
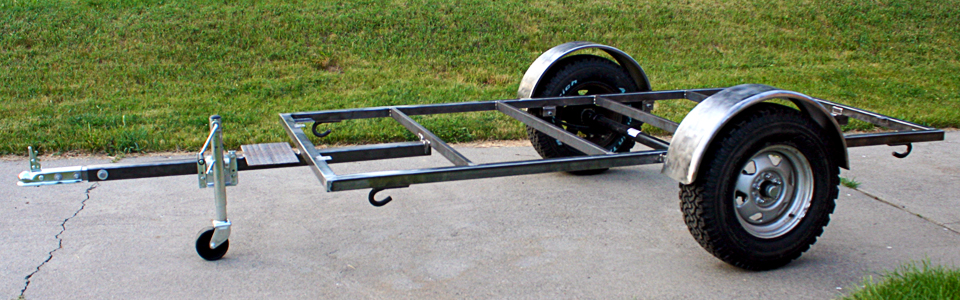
DIY Welded Teardrop Trailer Frame
Purchase new raw materials and teardrop trailer frame parts and weld the frame yourself.
The PROS
- Total Creative Freedom – You can build this frame to fit the exact needs of your teardrop body.
- No Adapting Required – Unlike all of the previous frames, there is no need to adapt materials or existing designs to fit your teardrop. Since it is a fresh build, there is less time wasted on problem-solving existing problems.
- A life-long frame – A quality welded teardrop frame can last a lifetime. Some teardrop frames were made by companies and individuals after WWII and they’re still on the road. There is also little maintenance required for these frames.
The CONS
- Fabrication takes time – Although likely faster than the Repurposed trailer, this trailer frame does take more design time than the bolt-together kit and, perhaps, the welded utility trailer.
- Metal Working Required – Builders need to be willing to invest in tools and skills to build their own frame.
- Up Front Costs are More – Long term costs are almost nothing but it does cost a bit more to do it right up front.
- Needs Paint/Powder coating – This trailer will require a finish.
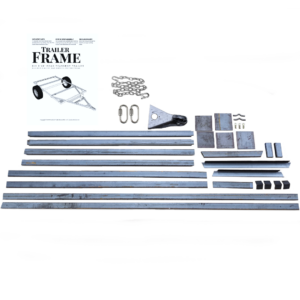
Overland Teardrop Trailer DIY Frame Kit
A laser-cut raw steel frame for teardrop trailers -that is made to our specification. This is really an extension of the DIY Welded Trailer but it is designed to help the home builder save time and the cost of tools/professional welding and design services.
The Pros
- Pre-designed/cut/drilled – A teardrop frame design that is accurately cut to length and pre drilled for mounting the teardrop body and running all wiring. A considerable time saving option.
- Saves Professional Welder Fees – Some DIY builders purchase this kit and have a professional welder fabricate it. It saves the cost of having the welder cut, drill, and design a frame. The welder spends a few hours welding.
- Fewer Metal tools required – This frame can be done with 2 tools: a welder and an angle grinder.
The CONS
- Needs Paint/Powder Coating – It is raw steel and will need a finish
- Some tools required – Fewer than the DIY welded trailer but more than the Utility trailers in this list.
- Costs More Upfront – the trade-off for a higher upfront cost is time savings, low lifetime maintenance, and a lifelong trailer frame.
Which frame is the best?
There really isn’t one answer. It’s the frame that gets you camping and that has acceptable trade-offs.
For me?! It’s still the DIY Welded Teardrop Frame or OT Welded Kit. When I built my first teardrop trailer in 2007, I made my own teardrop frame (See That Build Here). It wasn’t perfect but it’s still on the road 15 years later and will last even longer than that with minimal maintenance.
After working on all of the bolt-together kits and the home improvement center utility trailers that are adapted to teardrops, they aren’t worth the maintenance headaches and design compromises. I’d rather go camping than do maintenance on my trailer frame.
Take a Deeper Dive into these 5 frame options?:
There is a video at the top of this article. I cover these main points and more in the video. By the end of the video, you’ll have all of the information on teardrop frame types that I have gathered since starting this business in 2007.
Let me know what you think!
Mark